Updating the Database
As you know, CheckIn is built using FileMaker and updating an intricate database like CheckIn is not that straight forward so in order to make it as easy as possible, we built a small FileMaker database to assist with this process.
Not all updates we push out will require all elements of the CheckIn database to be updated and therefore for each update we will have the proper check boxes already chosen for you when launching the Migration Tool. (at times we may indicated other instructions in the update email) We’ve made upgrading as easy to use as possible, but will still require a few steps. Please follow the steps outlined below slowly and carefully and you will be on your way to enjoying all the enhancements each CheckIn version provides!
Step 1. On your FileMaker server, enter the FileMaker Server Admin Console through safari via the following Address:
http://127.0.0.1:16001/admin-console/signin
*link only works if you're viewing this document ON your server
*(During the FileMaker server installation, a link to this address is added to your desktop and during the setup of CheckIn we also place this link in the favorites bar of Safari)
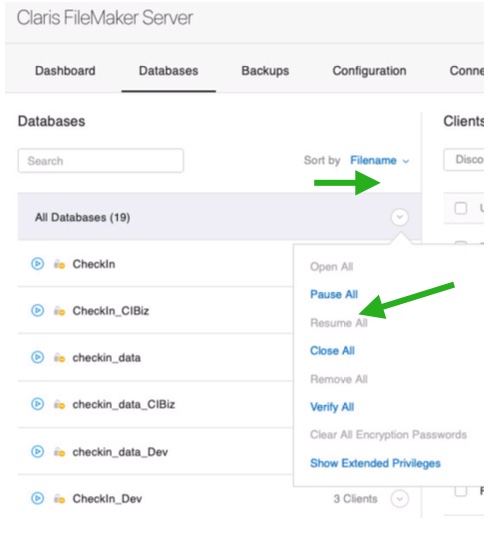
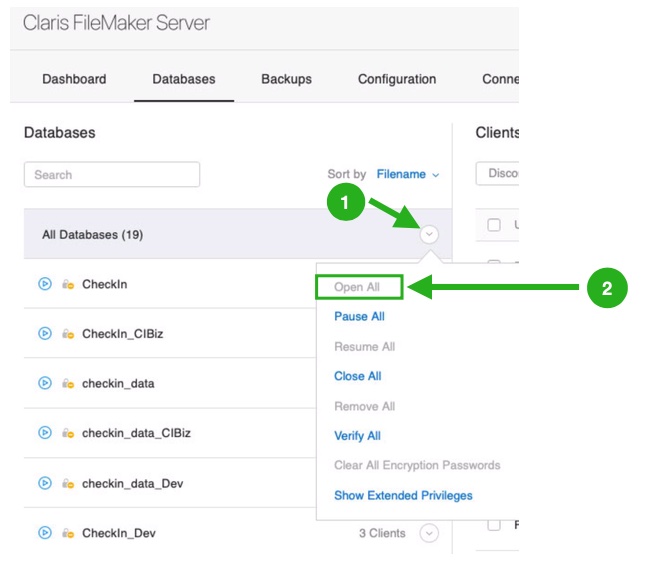
Step 2. Go to the Databases tab and Close All the databases by clicking on the down arrow icon in the grey All Databases section as illustrated to the right and then chose Close All.
- Once the databases close - the little blue circle icons with the triangle in the middle will no longer be blue (they go to red for a bit then to grey when the databases are finally closed.)
- You can send a message or disconnect a user listed at the right in the Clients section if need be.
Step 3. Download the FileMaker file called “CheckIn Data Migration Tool for x.xx” *(Please note: version # at the end of the file name will change with each new update.)
- We are currently at 4.2v3 - Click here for download.
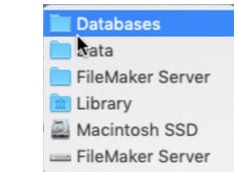
Step 4. Move this “CheckIn Data Migration Tool” file into Databases folder (The image shows the path to get there): Which is: Mac HD>Library>FileMaker Server>Data>Databases
Step 5. Launch the CheckIn Data Migration Tool by double clicking on it.
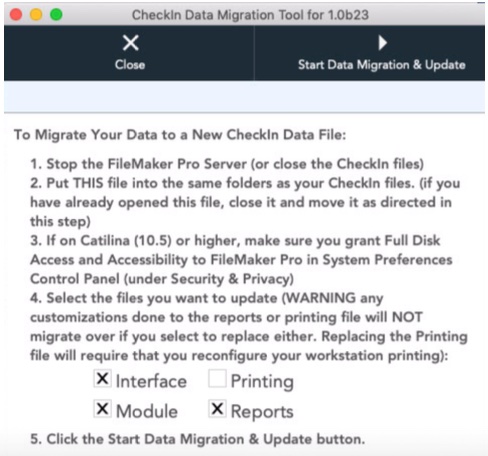
Step 6. The CheckIn Data Migration Tool will bring up the window seen below and will have the appropriate checkboxes pre selected for you. *(At certain times we may tell you to also check off the printing files.)
Step 7. Click “Start Data Migration & Update” ( This will trigger the backup of your files, the installation of new files and it will also trigger the Terminal app to migrate your data to the new data file.)
*The check boxes will be pre-selected for you so please do not change what you see checked off unless otherwise instructed.
Step 8. You will then see a small Notice window pop up. Before clicking on OK to close it, you will need to observe what is shown on the terminal window that opens up during this upgrade process.
1

2
Once you see that the Data migration is completed (where the last line of the terminal window says End:), you can then click OK on the Notice window:
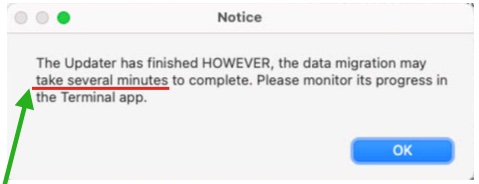
Please be patient and make sure you see the process End before moving forward!
FYI. A backup copy of your existing database will be made and automatically placed into the folder called “Removed_by_FMS/checkin_backup_MM_DD_YYYY”.
Step 9. Click Close on the Migration Tool window and Now remove the Data Migration tool from Databases Folder and place it in the trash.
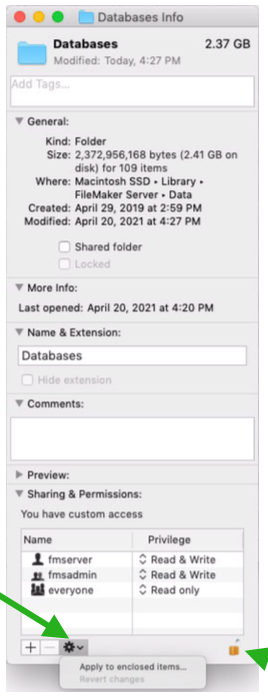
Step 10. IMPORTANT: You must set the correct permissions to your new CheckIn files in order for FileMaker Server to host them. First click the Lock item at the bottom right then enter your servers system password.
Set Permissions by getting Info on the Database folder you were just in and simply choose “Apply to enclosed items” as pictured in the image to the right:
Step 11. Enter the FileMaker Server Admin Console again via safari:
Go to the Databases tab and Open All the databases by clicking on the down arrow icon in the grey All Databases section as illustrated to the right and then chose Open All. This will open all the CheckIn databases you closed earlier and the little circle icons with the triangle in the middle will turn blue again.
You can now get back to work and launch FileMaker on your workstations to get back into CheckIn.
If you are upgrading from Checkin 4.2v1 or earlier, there are a few extra steps that must be taken to ensure that GSX continues to work.
After the update is complete open the admin section of CheckIn and click on Company, then on the new 'GSX Setup' tab.
Your window should be as shown.

Be sure your GSX base URL does NOT have the uat section in the address.
Make sure your 'shipto' 'sold' & 'privateKeyPassword' fields are correct and have no leading or trailing spaces.
Verify you're on version 6 of GSX.
And finally, you can now drag and drop your certificate and private key files to the boxes on this page. This is a major upgrade from the previous way these files were handled.
Direct your questions to: [email protected]